Wednesday, June 4, 2008

Kiln Foundations


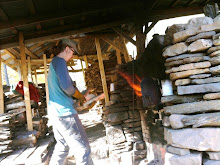
With the old Firebox gone, I laid out a rough image of my kiln just so that I could see the physical dimensions. To obtain enough slope I have to dig down. I started in the front with the firebox and the area in front of the firebox. These pictures show about half way dug out. I will eventually dig down about 28 inches in the front. Then I will move to the back and dig down and start setting in my floor... I am also contemplating about what to do for a subfloor, or do I even need a subfloor between the bricks and the clay...

Friday, May 23, 2008

Kiln De-Construction


The next step in building my kiln is to de-construct the Firebox from the old kiln.
Upon removing the bricks from the firebox I have discovered that it had become a habitat for Salamanders over the winter and spring. I unearthed 12 of them and they all ran up into the kiln upon being found....
Maybe the new kiln should be named for the Salamanders...

Friday, May 16, 2008

Roof is up!


My metal finally came in, and the rain held off long enough, so I was finally able to get my metal roof on. Now my work area is out of the weather and I can start on the actual Kiln!!!

Tuesday, May 6, 2008

A roof for my Kiln


I attended a kiln building workshop in mid march in Mt. Pleasant, PA to gain some needed skills and experience on building kilns. When I came back I was ready to build, but first I needed a roof!
I layed out some basic dimensions for the kiln (and decided to use the hand dug kiln as a smoke trail leading to the same chimney) and built my roof around that. I was able to use some old Chestnut posts that I scavenged with a friend out of an old barn and some Locust posts that were cut by my neighbor. They are not exactly straight, but they got character. I used 2"x6"'s for the roof supports and 2"x4"'s for the purlins. It will receive a metal roof as soon as it comes in (metal locally made at a wheeling-pitt factory and bought through my local hardware store). Once the roof is up then I can focus on the actual Kiln!
You can check out more pictures of the roof construction at http://www.flickr.com/photos/stefflthompson/sets/72157604373310113/

Friday, April 18, 2008

Firing The Fox Hole Kiln


After building the Fox Hole Kiln we tried to fire it three times... Each firing was a learning opportunity, but unfortunately, it also showed me that it wouldn't work...
After an initial few hour warm up, the kiln would reach cone 4 in the front within 12 hours and then flame would start to reach out the chimney. But upon firing for another 12, 16, and finally 24 hours longer, their would be no temperature increase and the clay started collapsing off the walls.
For the third attempt I tried to tweak out the kiln (added height to the chimney, better designed grate system, looser stack of work, installed a damper on the chimney, and tried to add more air flow in the front) but none of that seemed to have any response and it felt like I was just wasting wood...
But I don't mean to sound negative about it because it was a wonderful opportunity and teacher for how I want my work and ideas to develop. It felt great to stoke up the front and watch as that flame would work through the kiln to come out the chimney!
You can see some pictures of firing the kiln at : http://www.flickr.com/photos/stefflthompson/sets/72157600420270182/

Kiln Building- The First Fox Hole Kiln


My first attempt at building a kiln was very rustic. I wanted to start at the beginning of the wood fire process and so decided to dig a kiln out of the clay enbankment! With the help of my wife and a friend we dug a hole that was 7 feet long and sloped up to make the body of our kiln. We then dug straight down into the hillside to join up with the body to make our chimney. And in front of the clay hole we built a 3 foot long brick firebox.


To load the kiln, you had to crawl in through the front firebox (which measured 3 feet tall by 2 1/2 feet wide) and load the work on your belly. Not the most comfortable position to work in...


But I have to say that there was a really wonderous feeling I would get when laying in the kiln working with the clay bank to make pottery. It is that feeling that I want to embody in the soul of my work...

Pictures documenting the building of the kiln can be found at : http://www.flickr.com/photos/stefflthompson/sets/72157600224896425/

Wednesday, April 16, 2008

Pit Firing


Upon moving back to the Ohio Valley I was without a kiln to fire my work in. So, while I have been working on building a kiln, I have been playing with Pit Firing. It is actually a very enjoyable method of working and the results are highly distinctive while showing the process of fire.

These pictures document the process of Pit Firing as how I have been experiencing it.